Some of us may say at one point of our lives: “Gee, I wish I had a robot that could fit in my small apartment and that would be so fun to drive around right now. Plus, if I feel up to it, I could challenge myself to see if I can get it to roam around autonomously!”
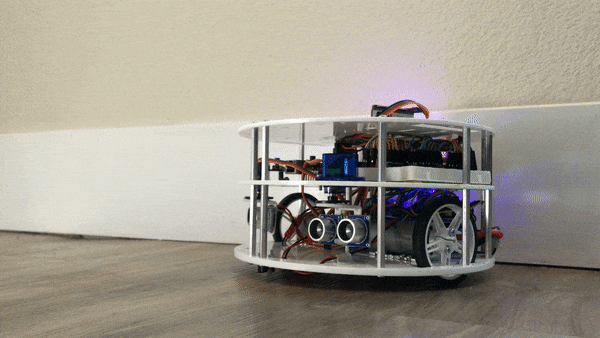
This project may be the fruition of that idea. Meet FloorBot: a two wheeled robot that can drive through any hallway of your carefully sized living space. Measuring 12″ in diameter with a zero degree turning radius, it could navigate around any corner or coffee table with ease. Equipped with two servo actuated ultrasonic distance sensors, it can detect and avoid obstacles that enter in its path under its own (partial) autonomous control. I learned a little bit about the ESP32 over the course of this project, so FloorBot also has WiFi connectivity and browser based control for easy use and loss of productivity while attempting new driving patterns.
FloorBot, in its present form, is a fun prototype that was built using off the shelf electronics in order to get running as quickly as possible. It is by no means perfect. There is an ongoing effort to achieve fully autonomous roaming for this vehicle, which is also proving to be quite challenging under limited hardware selected for this prototype. This page is merely a rolling log of FloorBot’s achievements, highlights, and construction. As more development is done over the course of FloorBot’s lifetime, this page will be updated accordingly.
Floorbot’s Achievements
Autonomous Wall Avoidance
Wall avoidance is achieved by the onboard ultrasonic distance sensors. As shown in the video below, the distance sensors may be set at fixed angles, or they may be pivoted in order to cover the front and sides of the robot.
WiFi Control
Control over WiFi was achieved using an ESP32 dev board and some modified javascript from jeromeetienne’s virtualjoystick.js library. It really makes a huge difference in testing out vehicle controls and movements. Even though there’s a lot of latency over the WiFi network (as observed in the video below) as least there’s a way to easily position the vehicle in new locations without even leaving the computer screen.
Build Details
Powertrain and Power Electronics
The robot powertrain is located on the bottom shelf of the vehicle. It consist of two DC gearmotor with magnetic rotary encoders, a power electronics assembly, and a 3S lipo battery.
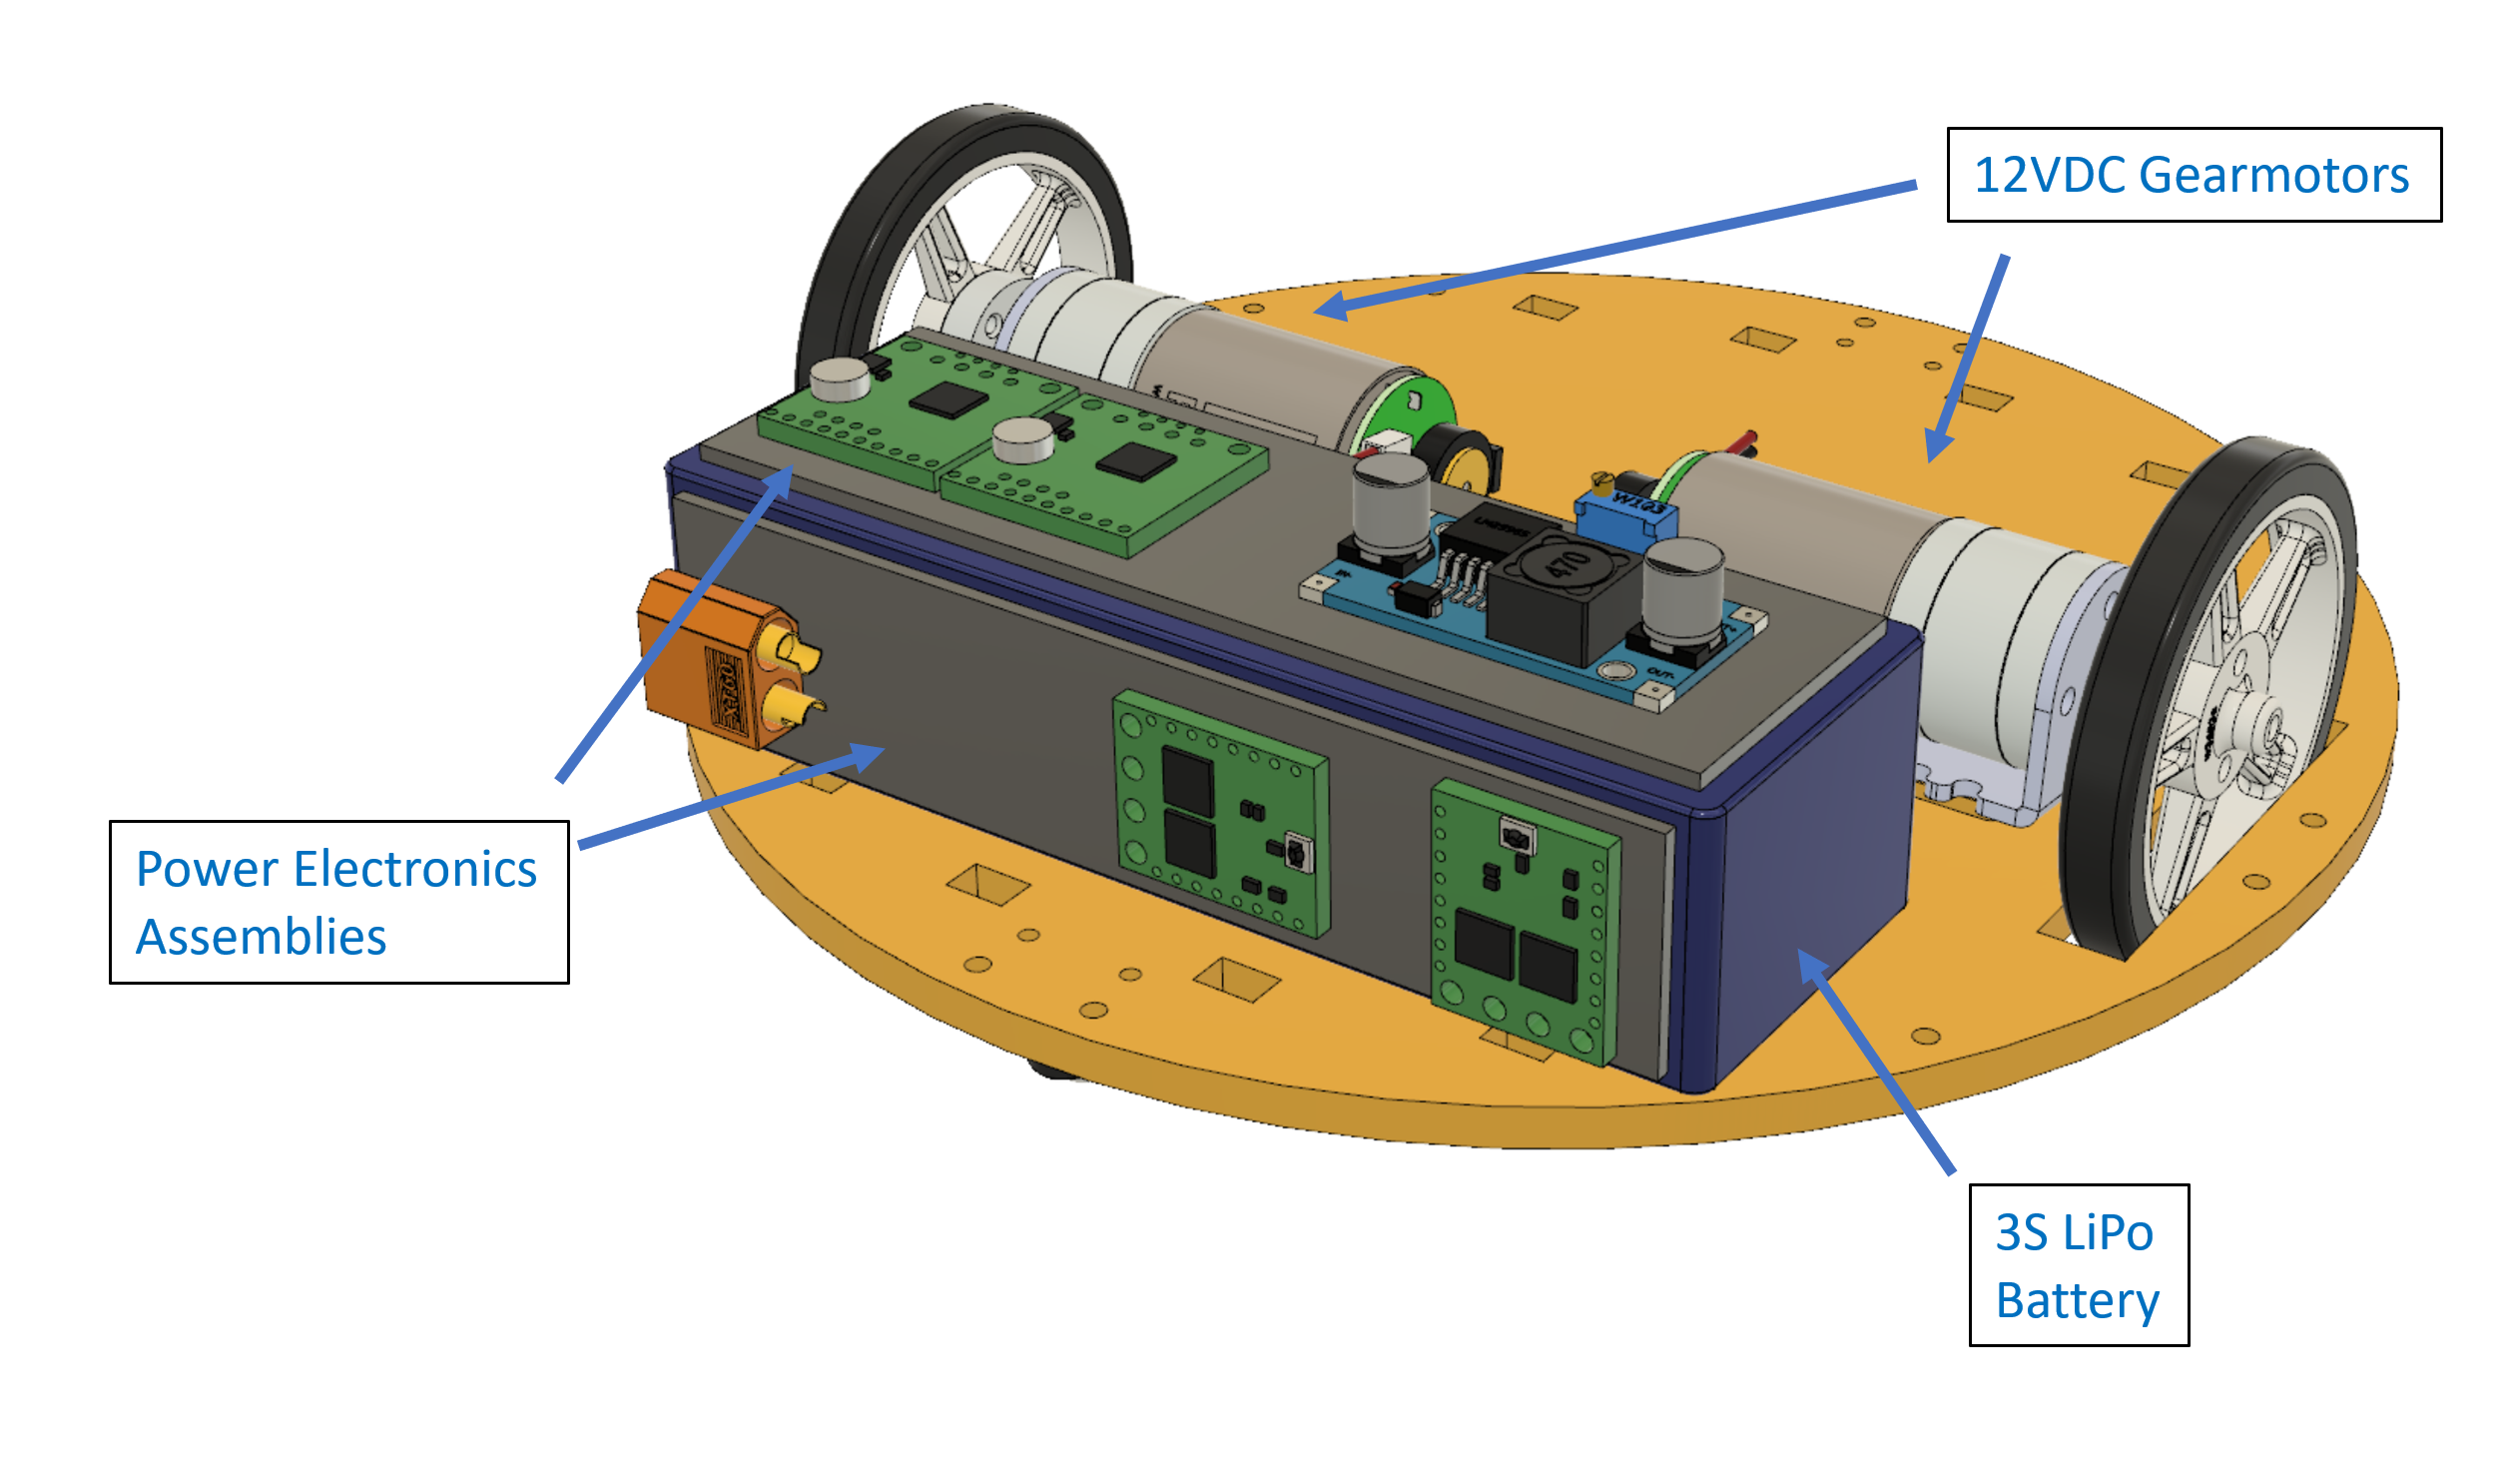
One cool thing about the power electronics assembly is that it slides directly on top of the LiPo Battery. This was done in an effort to minimize the length of power cabling and to keep high voltage electronics as far away from the low voltage digital control electronics as possible.
The picture below captures the power electronics assembly in an early prototyping phase, prior to soldering on any wires. If you look closely enough, you can see how I made the electronics sled: by cutting up an old gift card and linking the two half together with clear packing tape.
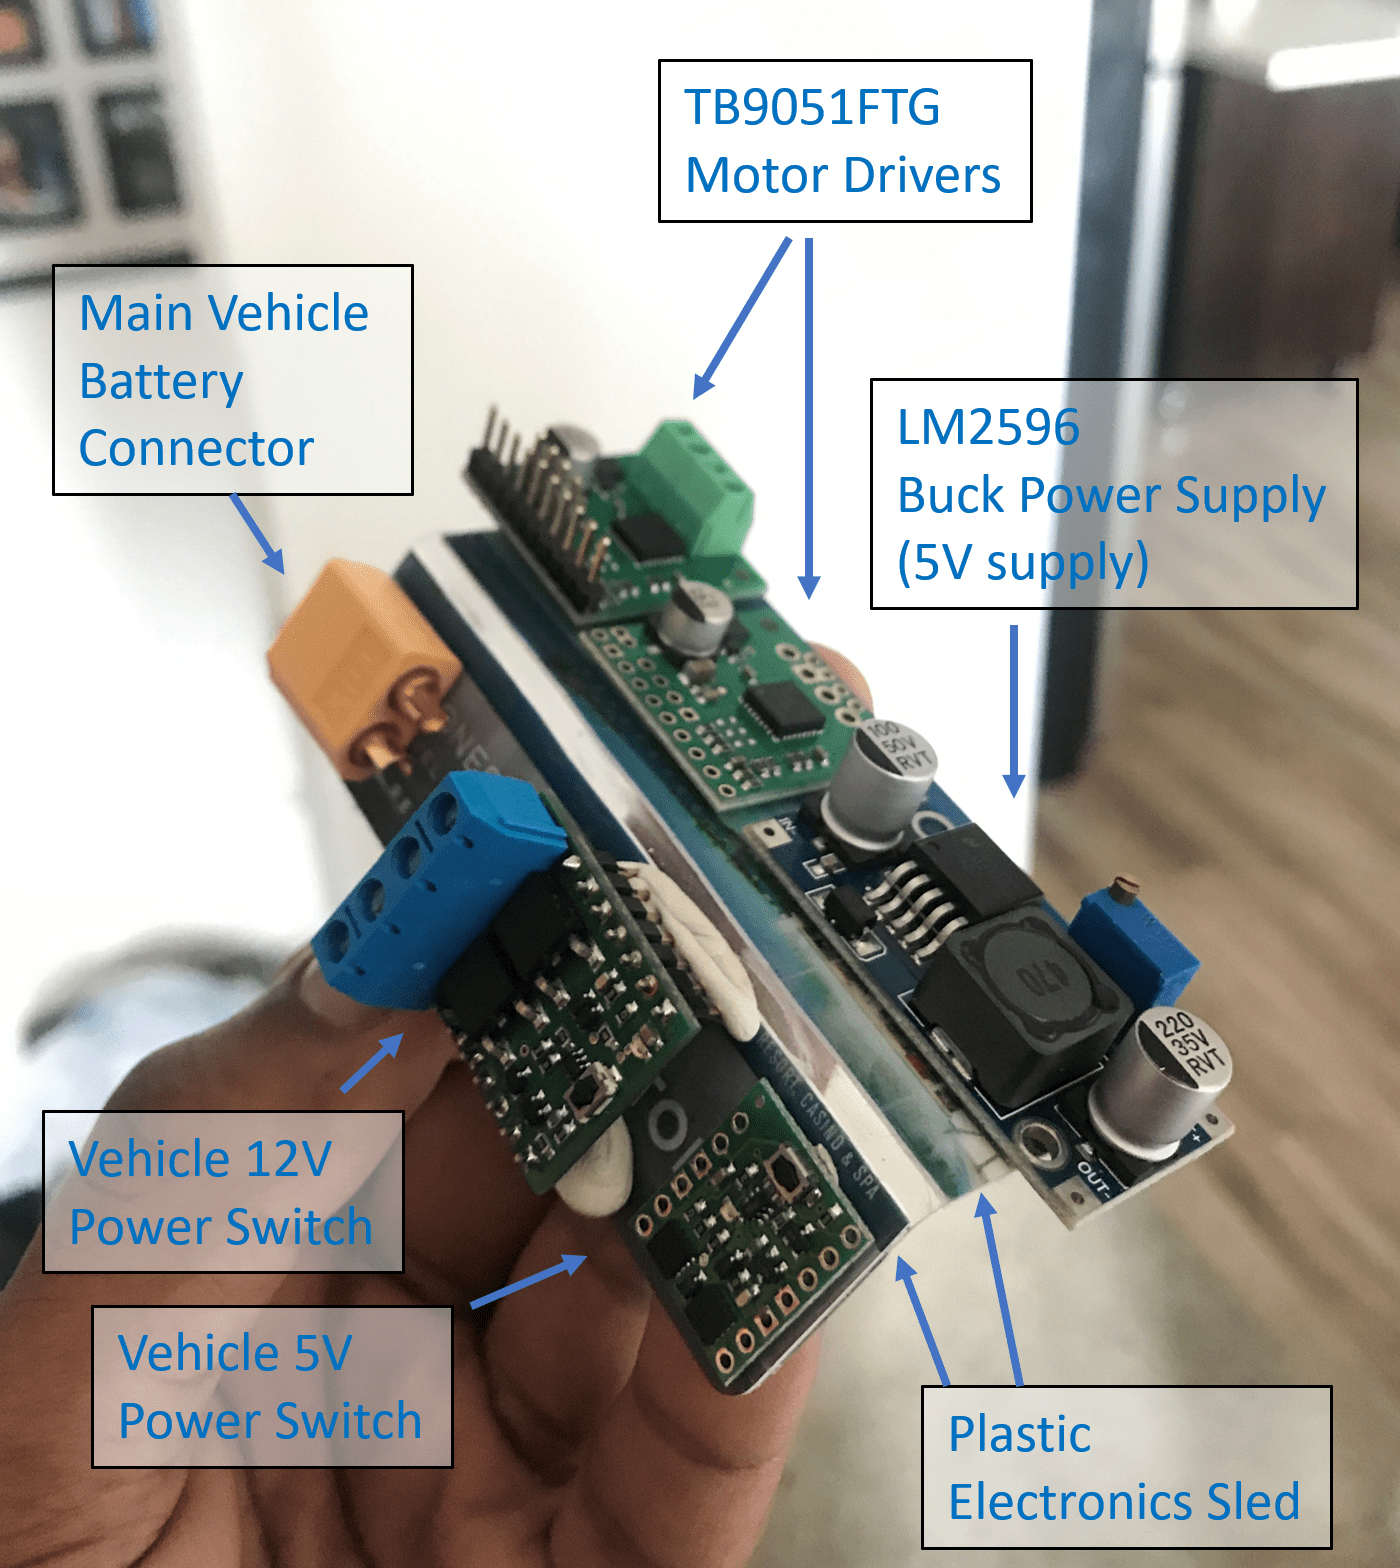
This ended up making for a cool flexible PCB assembly that slides right on top of the battery pack. The flexible nature of this assembly also helped during the wiring process, as I was able to lay it flat on a table for solder prior to inserting it in the vehicle.
Servo mounted distance sensors
Distance sensors were mounted on servos in order to give FloorBot ability point them in direction of travel. This was meant to save on costs of having to build some large circular array of +3 SONARs, or having to invest in some LIDAR based solution.
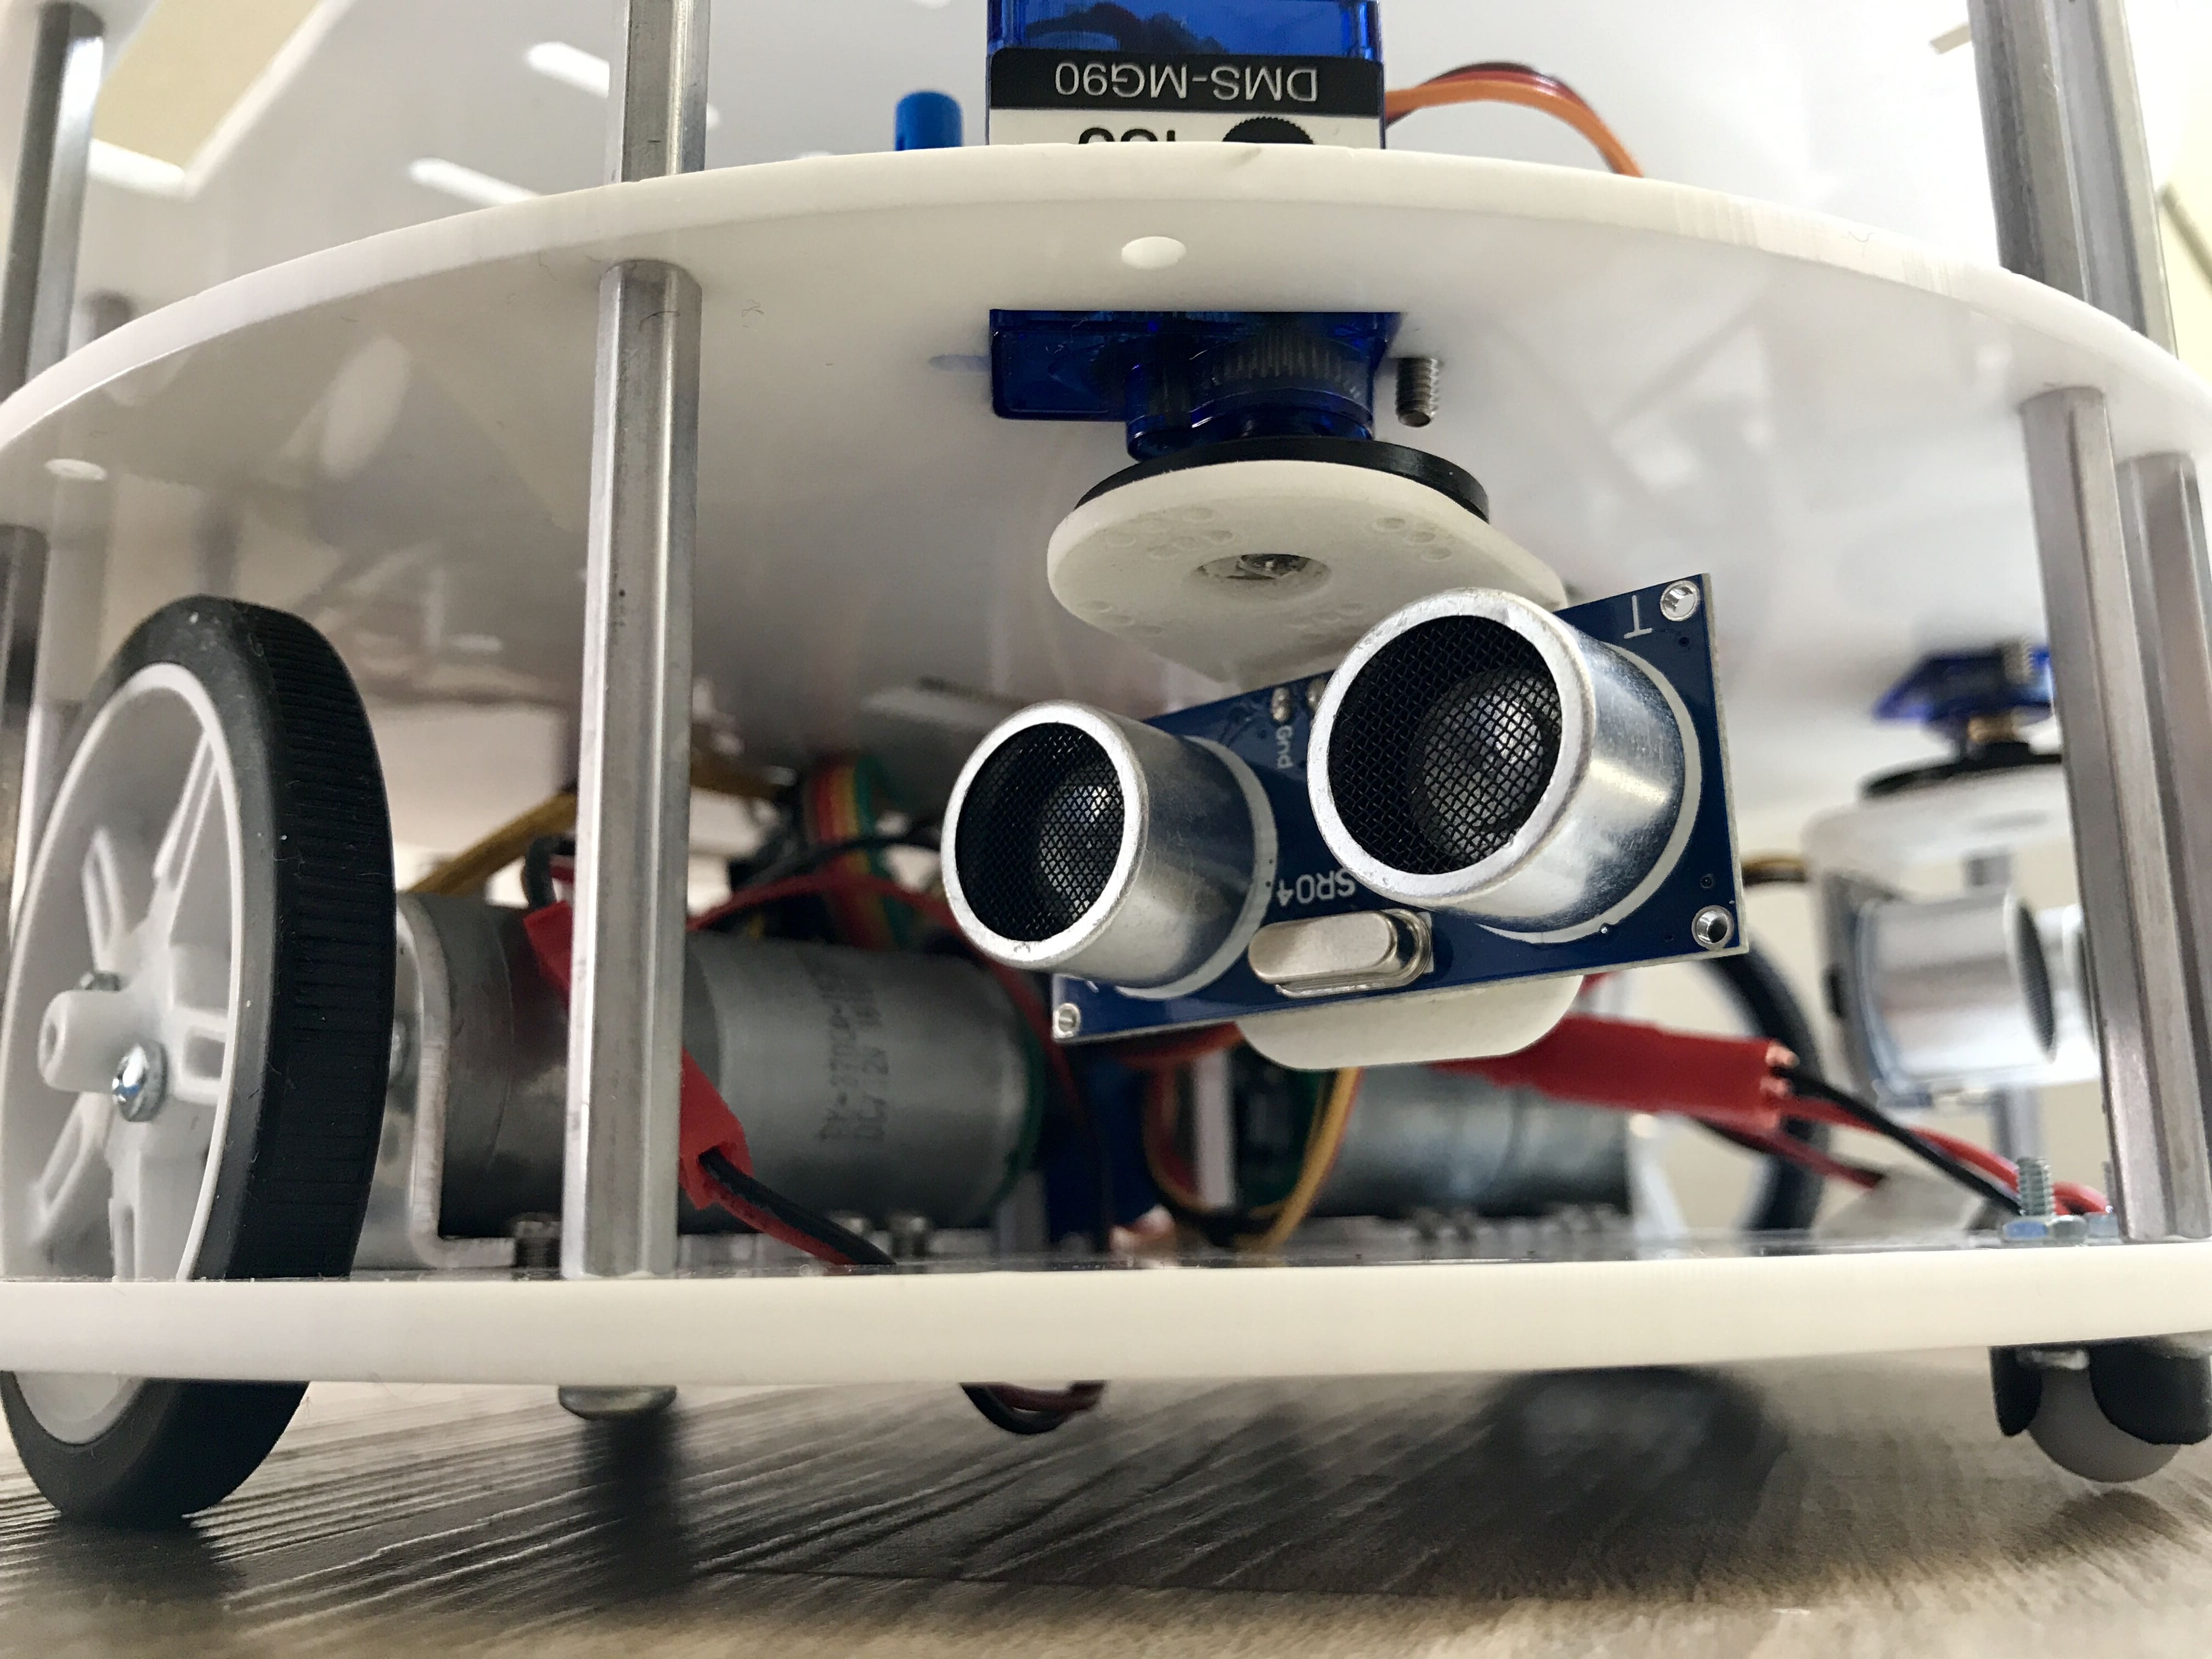
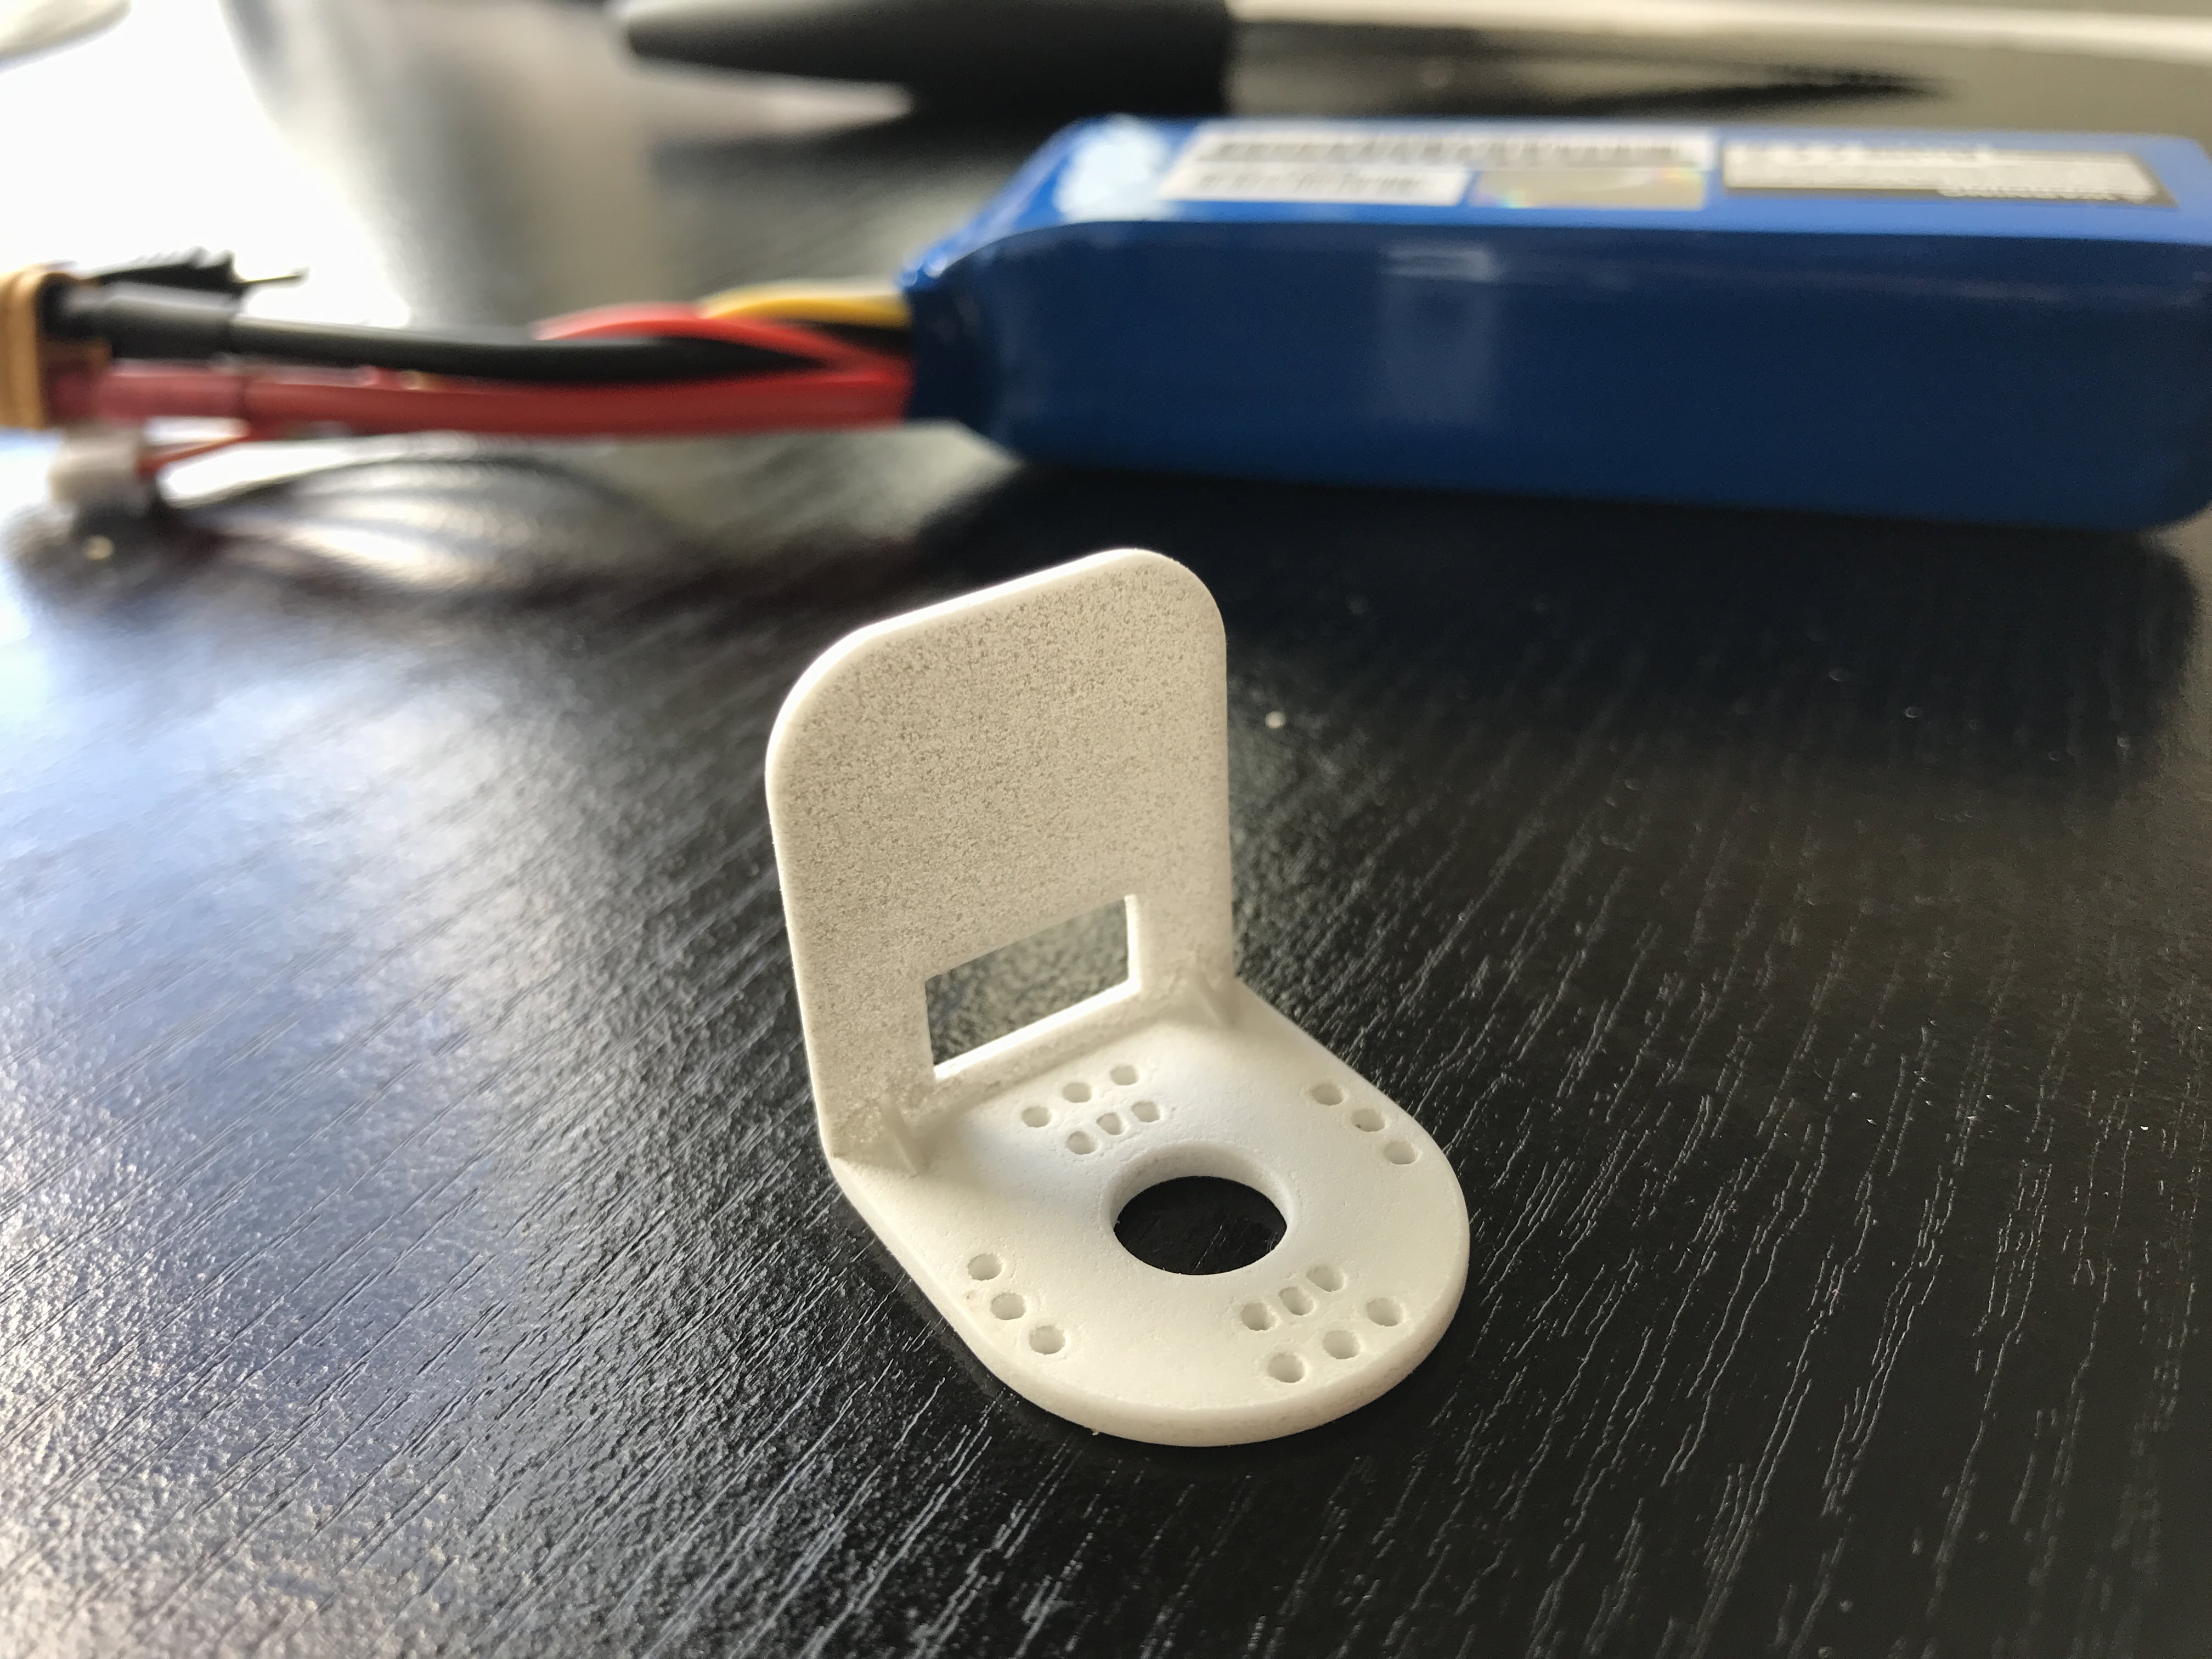
In order to mount the distance sensors to the servos, small L-brackets were 3D printed for each servo. The bracket contains holes for afixing the bracket to your standard servo horn, and a larger rectangular cutout for feeding wiring into the distance sensor connection pins.